Receive all updates via Facebook. Just Click the Like Button Below

Powered By | Blog Gadgets Via Blogger Widgets

Friday, April 20, 2012

I Was Framed!

A couple of weeks ago my best friend flew me down to Phoenix, AZ to help redecorate her daughter's bedroom.  I had a great time transforming her room into a "Parisian Salon".


I had so much fun working on this and I was inspired to do some "framing" in my house, too.  Yet again, Pintrist to the rescue.  I found some awesome inspiration such as this family photo wall.  Since my family is a bit more, hmmmmm...., non-traditional, I decided to use some more appropriate quotes.

Here it is!


I bought almost all of the frames at the dollar store and spray painted them all the same color (some were old frames I had laying around the house). I used Command picture hangers to attach them to the wall (this makes them easier to reposition and change out pictures).  I cut the quotes out using my Cricut and black vinyl.  Some of the frames are still empty and almost all of the pictures are of my girls but I hope to replace them with family photos soon.  I already have my mom finding some good ones for me.

So, what do you think?


Wednesday, April 11, 2012

I Pinned It...And Then I Did It!

Yes,I admit it, I have whole-heartedly jumped on the Pintrist bandwagon.  Addiction cannot possibly begin to describe my relationship with Pintrist.  I thought I would share with you some of the ideas I have used since I started "pinning".

I found this link on how to make Easter Eggs with balloons and embroidery floss.  I made them a little differently, but it was such a cute idea I had to try it out.
Things I did differently:
1) I used cornstarch instead of flour
2) I wrapped the embroidery floss around the balloon first and then dipped it into the starch mixture.


Another project was this one for a Fabric Flower.  I made mine out of left over costume satin from Halloween.  I LOVE this project!  I used my heat gun instead of a candle (the truth is that I kept setting the fabric on fire).  The flowers are so light and airy that a bobby pin holds it easily in your hair!


I had to make this cute TuTu for the girls! I made mine in Blue and Gold to match their Pitt T-shirts.  Let's Go Pitt!  I tied the fabric onto my broom so they would be uniform and then threaded them onto the elastic.  My girls love them, but refused to model them for me.


Ok, last one!  I used this Superhero Sucker Tutorial to make some awesome cupcakes!  They were called "epic".  I made Superman, Spiderman, The Flash, Batman, Robin, and Captain America.  Are fondant and the entirely edible.  Yum.


Can't wait to share more of my Pintrist discoveries with you soon!

Sunday, February 12, 2012

The Mural is DONE!

Rapunzel's Tower Mural
It only took me 7 or so months. Let me start at the beginning....

This past summer I took apart our nursery *tear*.  The girls were going to both be in elementary school in the fall and I thought we should put them in the same room.  The girls picked out paint colors, new bedding and I bought them a bunk bed.  Our theme ended up being "Princess Flower Garden".
We decided on a mural of Rapunzel's tower for the wall.  So, after painting the room, assembling the bunk bed, rearranging the room, and hanging the curtains I started on the mural.

Colors we picked out
New curtains and a little paint
I drew out the tower in chalk
Blocked in the color
Added in a little green


Started the tower detail
This is how it has looked for the last 7 months.
 I wanted to finish the mural before my oldest's birthday party next week.  It took me about 3 hours to finish it, but it turned out just as I'd hoped.  Here are the next steps I took:

I added light green "leaves" and "grass".
I used a medium sized angled tipped brush and just stippled it.  Then I did the same thing with a darker green.  I used a smaller rounded tipped brush to add dark pink flowers.  I made large and medium flowers with four petals and small flowers by just making one dot.

Close up

From further away

I used the same brush to add light pink to the flowers.

I used a smaller rounded brush to paint light and dark purple flowers.
 I also added some details onto the tower as I switched colors.  I only used 7 colors for the whole thing, but I mixed them together as needed to make more colors.
Close up.

I left a special message for the girls.

Finished tower looking up at it.
Looking down at it from the top bunk.
 I love it, but more importantly the girls love it.  Hopefully they don't want to paint over it anytime soon!  Let me know what you think...make my day by leaving some feedback!

Thursday, February 9, 2012

No cakes....What do you mean NO CAKES?!?!?!?!

This week I have no cake orders.  It is the double-edged sword of being a crazy creative person.  While I am glad to let my elbows rest (I seem to have gotten Tennis Elbow from rolling fondant) I have no creative outlet readily available.
What to do....what to do...
I honestly have at least 5 ongoing projects I could work on, but they hold no interest for me right now.  I want something new, something hmmmm.....
It isn't like I hide my crazy, but even so I find it hard to admit what I ended up working on.  It seems so mundane.  So expected. 
I went to work on my daughter's birthday party invitations.  The twist: Her birthday is at the end of April.  Please don't judge me.  I just couldn't help myself.  I console myself with the fact that sometime in the next 10 weeks or so I have saved myself from having to devote time to this task.  And, they turned out super cute.


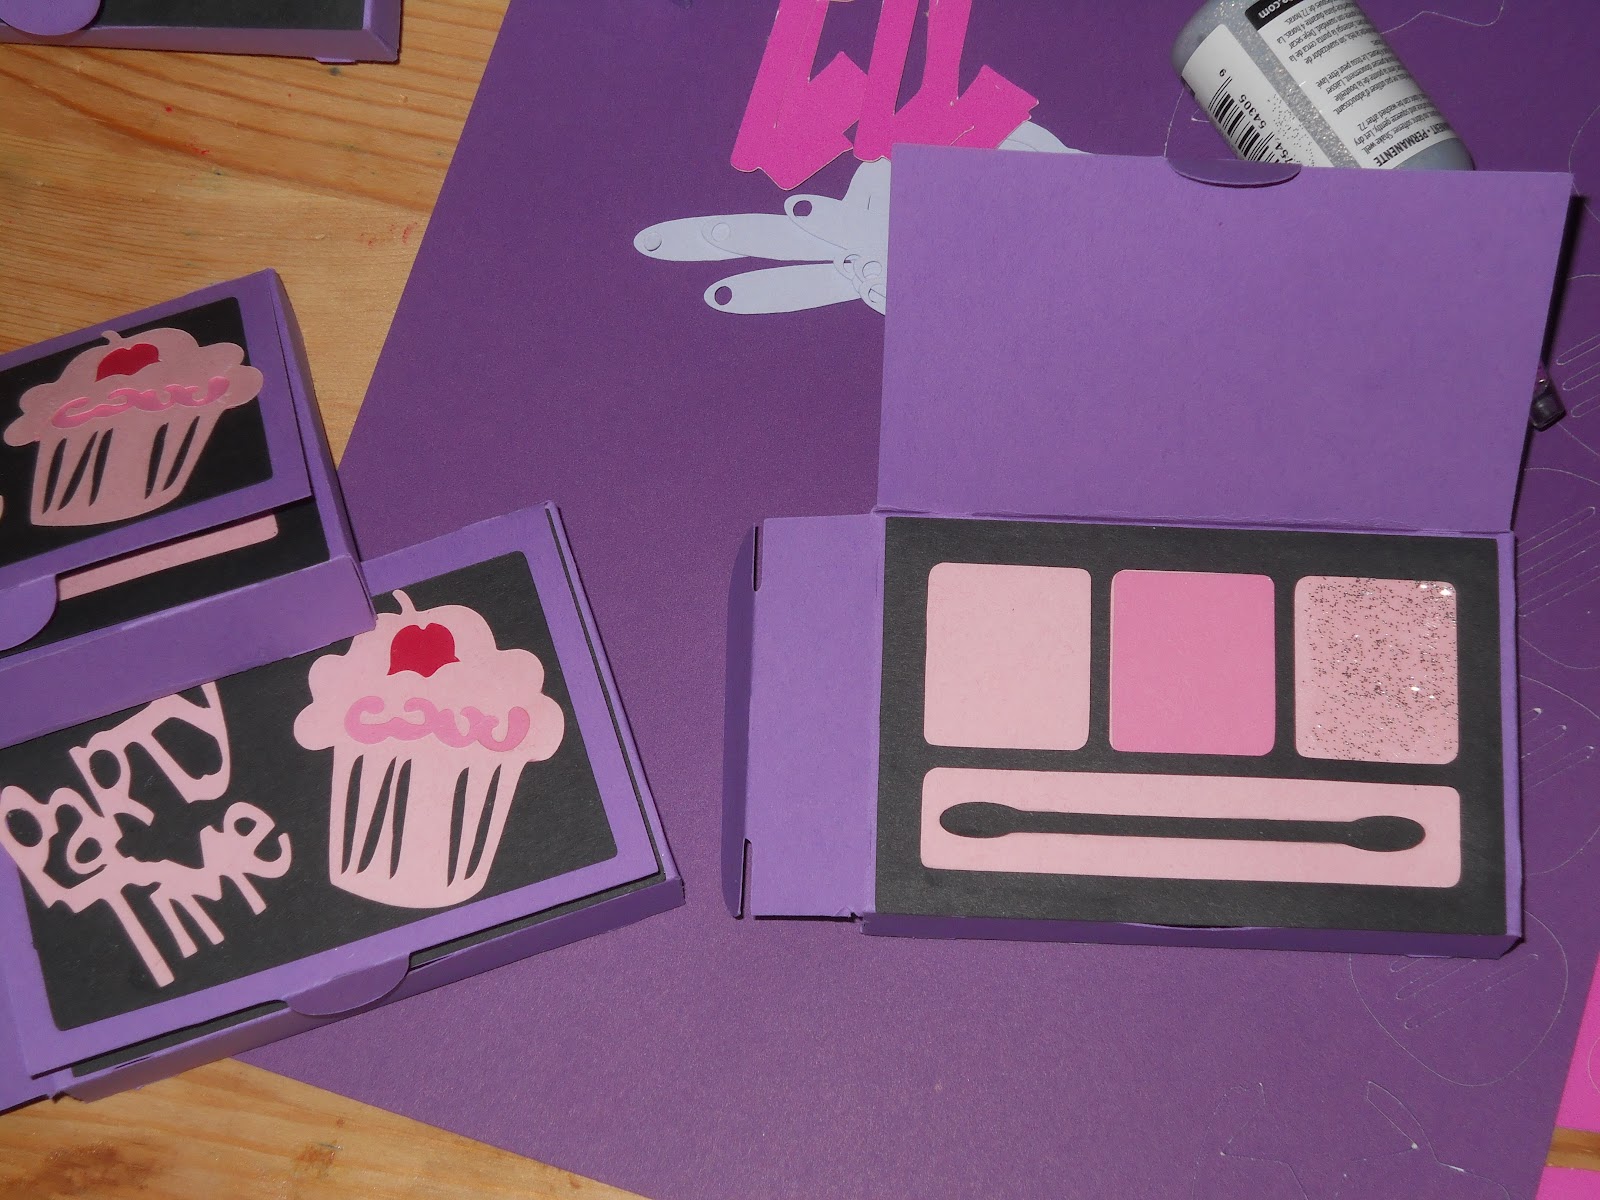
6th Birthday Spa Party Invite
I used my Cricut with a couple of different cartridges, nailpolish, post-it paper, and puffy paint.  The invite is actually a treat box and the "nailpolish, mirror and lipgloss" go into the box.

Inside and Outside of the Box
I added all of the info to the inside lid
Extra info on the extras
The nailpolish bottle says, "We will be doing mani-pedis".
The mirror says, "We will be having all-natural facials."
The lipgloss says, "Please wear your bathrobe and slippers".

I wrote "Open Me" on the side of the box so no one misses all of this vital information.

Since the party is at noon I wanted to let the parents know I will just be serving cupcakes and ice cream and I always make sure to put my name for the RSVP.  There is nothing worse than having to call for "so and so's Mom/Dad".

My daughter loves them and that is all that really matters. 
Now what to do tomorrow....................................................................


Wednesday, January 25, 2012

How It All Began

A popular question lately has been, "Shelby, how did you start making cakes?" It is a little bit of a story, but I thought maybe those of you out there in Blogger land may be interested, too!

The Beginning:
I go all out for my daughters' birthday parties.  I mean ALL out.  I transform most of the house into whatever theme they have chosen for that year.  We start by picking a theme and then searching it on Google Images.  They pick out pictures of things they like and I save them in a folder made specifically for that birthday.
When my youngest was 3 and we were planning her 4th birthday party she decided on a Alice in Wonderland/ Mad Hatter Tea Party theme.  We were doing our annual Google search and we came across a picture of a cake that she just had to have.  "Mommy, that is all I want for my birthday.  You don't have to get me anything else, not even a Barbie.  I will be extra-special good.  Promise."  Then she gave me her big puppy dog look with the bottom lip sticking out.  I caved.

This is the picture we found:

It was on www.cakecentral.com ...which was a great resource on how to actually make the cake.


Here is what mine actually looked like:


Looking back I can't believe what a good job I did.  I had no idea what I was doing.  Now, almost 2 years later I have a lot more tricks up my sleeve, but still think this first cake was one of my best.

Tuesday, January 10, 2012

Bathroom Update....well, Update

Last night I spent 2 hours putting in the floor.  I have three "tricky" tiles left and I decided to wait until I was more rested to try to tackle them.  Probably a smart move, don't you think?

So far I have spent $45 of my $50.  I bought the tiles ($32) and two cans of spray paint ($8) and four drawer pulls ($5).  I am leaving the last $5 for anything last minute I may need to finish up.

After I cleared out the bathroom I started by taking the legs off of the etagere.  Then I spray painted the cabinet green (my youngest picked out the color and I think it looks pretty good).  I used Google images to find old soap and bathroom ads.  I printed them out and then decoupaged them onto the drawer fronts and the top.  I used a clear matte spray paint to seal them (I seriously put 9 coats on the top). I put on the new drawer pulls and VOILA!  Look at the difference:


While I was waiting for paint to dry on the cabinet I tackled fixing the walls.  I filled in all the holes and fixed some badly done seams.  I let them dry overnight and then sanded and primed.


Then I painted, and painted, and painted.  The walls got a fresh new coat of blue (from a can of 8 year old paint I had to pry the lid off of).  I mixed that paint with a darker blue for the back wall. Then I painted all of the trim a pure white.  Oh...I forget to tell you that I had to take all of the 1/4 round off of the baseboards first.  I will paint those separately before putting them back.  It was starting to come together!


It's alright to be amazed by me right now.  It does look sooooo much better!
Next was the floor.  I bought some budget conscious peel and stick tile that was surprisingly easy to install.  Cuts were easy to make by scoring the back of the tile, bending it, and then cutting from the front on the bend.  I used a straight edge and a brand new blade in my box cutter.  My only problem was around the toilet and it still wasn't that bad.  I used the entire box (a few bad cuts on some tiles near the end) and it really made a drastic difference!


Before
After
I still have to finish the floor, 1/4 round, and hang the cabinet, art and photos, but I am almost there.  I have decided against a new sink skirt because it now looks fine without one and it makes it look bigger.  I also think it looks better without a window treatment now that the wall is such a focal point being bright blue. Three days, some hard work and a gift card...can't beat it. Let me know what you think!